Stage 1:
1. Create an account in GitLab
GitLab is a web-based DevOps lifecycle tool that provides a Git repository manager providing wiki, issue-tracking and continuous integration and deployment pipeline features, using an open-source license, developed by GitLab Inc.
Create your account here: https://gitlab.com/users/sign_in
Our hosting, CI pipelines are supported by GitLab with licensing us with their golden edition. All our projects are hosted on GitLab, since it aligns more with free and open source ideology rather than GitHub. Our members will benefit from having seats in the Ultimate SaaS Plan from GitLab for projects.
2. Fork and star our repository
Make sure you forked and starred our repository at https://gitlab.com/fossnss/website. This will help us to verify your GitLab account.

3. Run the site locally
Follow the steps below to run the website locally, the commands below are meant to be run in a Terminal emulator:
Clone the repository
Now you need to clone this repo using git to your local machine to develop or to test.
# if you have not added ssh keys to your gitlab account:
git clone https://gitlab.com/fossnss/website.git fossnss# else, if you have ssh added your ssh keys:
git clone [email protected]:fossnss/website.git fossnssInstall NodeJs and NPM
We recommend using NodeJs version 14(LTS). To manage different versions of NodeJS installations, you may use nvm script for bash or your favourite shell. Follow this official guide to add nvm to your shell
# install NodeJs v14 and use it in nvm
nvm install --lts
nvm use 14
Install GatsbyJS
Now you need to install GatsbyJS, which is used to generate our static site. Follow this official guide to install GatsbyJS onto your machine.
npm install
npm install -g gatsby-cli
If there occurs any kind of
warningcheck hereRun website locally
gatsby developYour site is now running at http://localhost:8000!
Note: You'll also see a second link:
http://localhost:8000/___graphql.This is a tool you can use to experiment with querying your data. Learn more about using this tool in the Gatsby tutorial.Take the screenshot of the site, running locally
To verify completion of the aforementioned, capture a screenshot in the given format (make sure the site is running locally). Check the screenshot template here. You can submit the screenshot in next task.
4. Create a new membership-submission issue
[Final Step for the completion of Stage 0]
Create a new issue at: https://gitlab.com/fossnss/fossnss-membership/-/issues/new
Select Membership Request from Choose a template in Description. This will create a form inside the issue box. Fill-in the details.
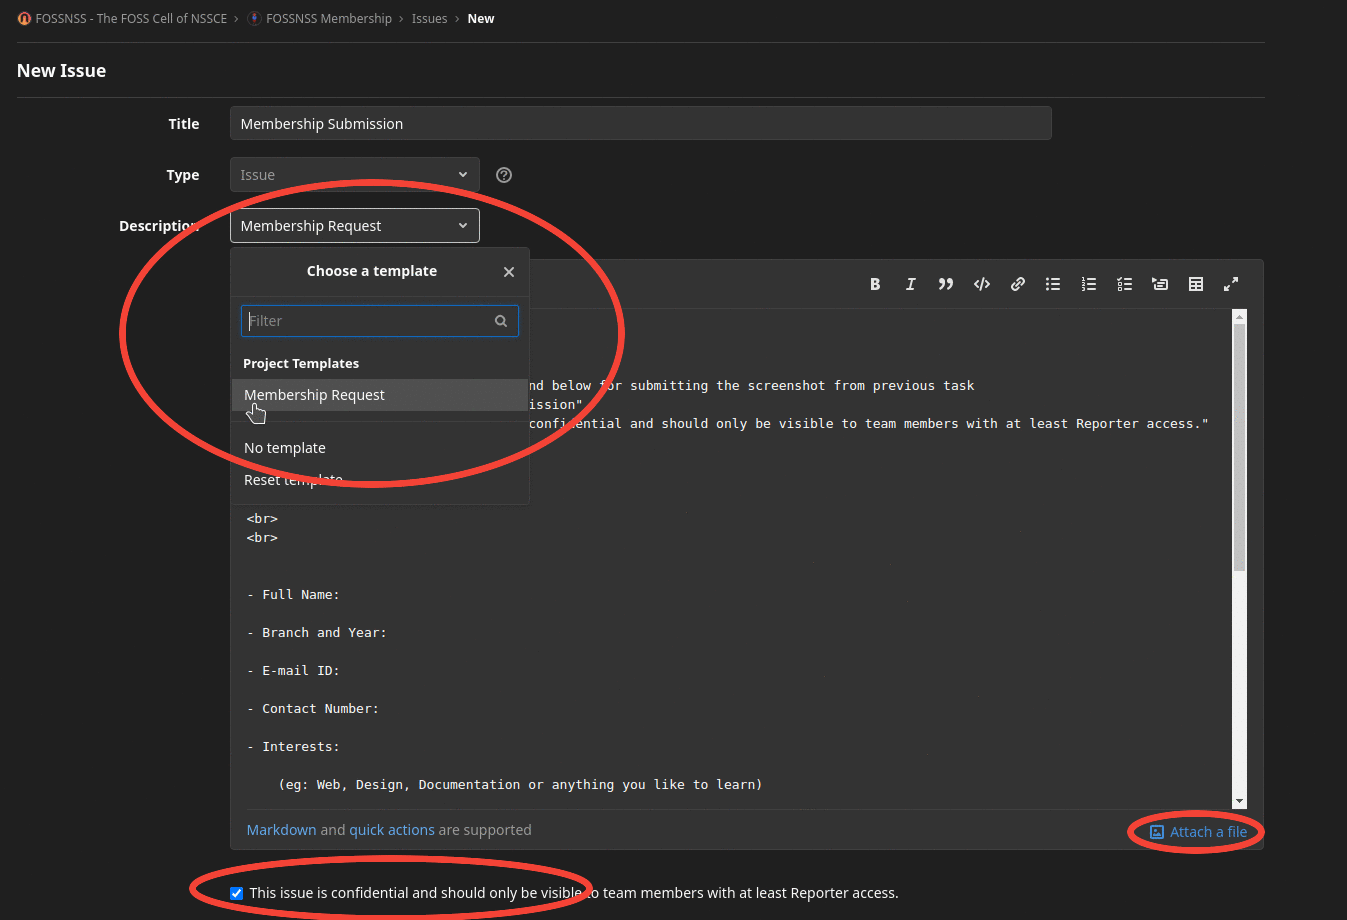
'Attach a file' option can be found at bottom of text-box for submitting the screenshots from the previous tasks. This is mandatory for the completion of tasks
Set the issue title as "Membership Submission"
Mark the checkbox "This issue is confidential and should only be visible to team members with at least Reporter access."
Set the Labels option as "membership-submission".
Complete the submission by selecting Create issue
Kaboom! You have successfully completed Stage 0 and Stage 1 of the FOSSNSS Membership drive. You have run our website locally, and learned how to start a new issue and a new repository. These are some basic stuff about open source. To take it further, try to use Linux as primary OS, and start learning Git - the most popular version control system.